The guide in documentation is clear enough. The kit includes a CD with documentation and same documentation can be downloaded from www.elegoo.com. I'm not going to describe detailed steps because as I said before the documentation is pretty clear, and if you want more visual help you even can search videos in youtube that shows every step.
This is how the kit comes, you can see all stuff comes with individual bags.

DC Motors
Very nice detail that the motors have a cable tie which holds the wires so the solder joint doesn't break.

Chasis and motors

During mounting a motor on chasis the screw didn't match completely with the hole in the aluminium block (as shown in image above), fortunately as the aluminium block has same two holes in both extremes, I inverted the side of the aluminium block so I can use the holes located in the other extreme and those holes fitted nicely.
L298N module
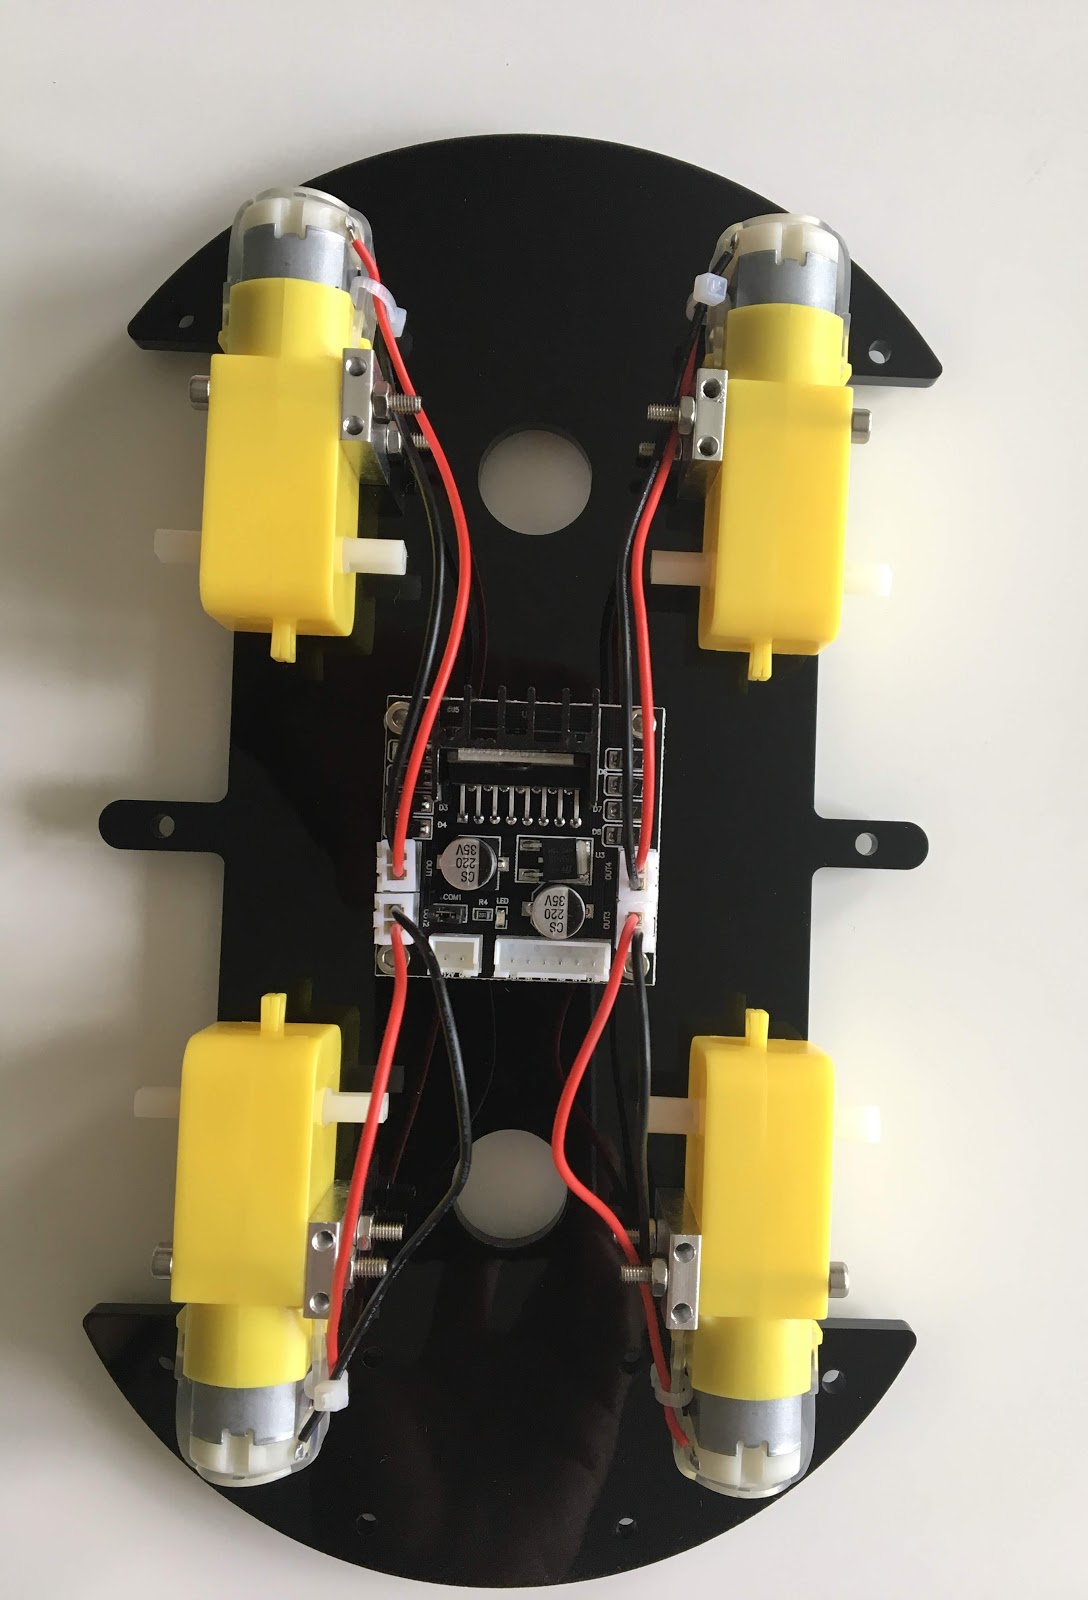
Here you can see the chasis with the motors and in the center the L298N module. There is no risk to make mistakes with wiring because connectors fit exactly in the proper way.
What is L298N module for?
Basically this is the driver which controls the 4 DC motors. The driver has 4 sockets for each motor, 1 small socket for power and a larger socket for control data.
Line Tracking sensor
Left image shows the sensor with the screws and right image has the chasis upside down and the sensor attached at front.


Arduino and sensor shield board
The arduino board should be attached to the top layer of chasis and the shield board goes over the arduino. The easiest way to figure out how those two boards fit is aligning the side that has two holes in image below.


Battery
Battery goes in rear part of the top chasis and wired with shield board.

Microservo SG90
This servo motor moves in a 180 degrees and is used to move the ultrasonic sensor to right and left in order to detect obstacles.
The Shield board has annotations in all connectors and they are numerated from 1 to 7. We want to connect the microservo in connector number 2 servo.

The connector and the color of the cable should match:
Brown = GND - Ground
Red = +5V - Power
Orange = 3 - Control signal

Ultrasonic Sensor HC-SR04
At left image the parts to use and at right image the mounted sensor.


Chasis


A tricky wiring is between line tracking sensor and shield board, because the order of the lines are different in both connectors:
In shield board connector the order is: GND, +5V, etc

In line tracking sensor the order is: +, -, etc

So the extreme of the cable which starts with red cable should go with line tracker. This is just to keep the convention of colours.
Car completed

One step I didn't mention was the bluetooth module which is a small board that is inserted in socket number 7 of shield board.
Final Comments
That's all for now. My next task is to learn about how to control all components and make a structured and maintainable code to play with the car.
As a conclusion, I found the assemble process enjoyable and frustration-free. I believe one can build a similar car buying the parts individually but you might face several problems about compatibility between components.
If you are interested in learning electronics maybe a good idea trying to build a second car with some variation and defining which components to include. If you are more interested in learning the programming part, just buy one of those kits and move forward.


